Course Description
“
This lesson looks at how to use artificial light from both a continuous light source and a short duration light source such as a flash unit.
We will cover how to get the best out of your portable flash unit that’s built into the camera and the more powerful and flexible unit that sits on top of the camera. Exposure metering, flash modes, fill-flash and taking the flash unit off camera for more creative lighting effects will all be looked at in detail.
Studio lighting is an unbelievably controllable and creative light source. In this course we will cover how to use multiple lights, setting lighting ratios, using lighting accessories and how to set the correct exposure for flash and continuous lighting is explained in depth.
Last but not least, how to light various still life subjects is explained. Solid subjects, reflective subjects, textured and multiple subjects will be looked at again in great detail. The use of a light tent and light table can be a useful addition to the still life/product photographer. Examples of the way these items of kit can enhance the way a still life subject can be lit will be demonstrated.
Once you have completed this course you will have a thorough knowledge of the various types of artificial light and their creative potential.
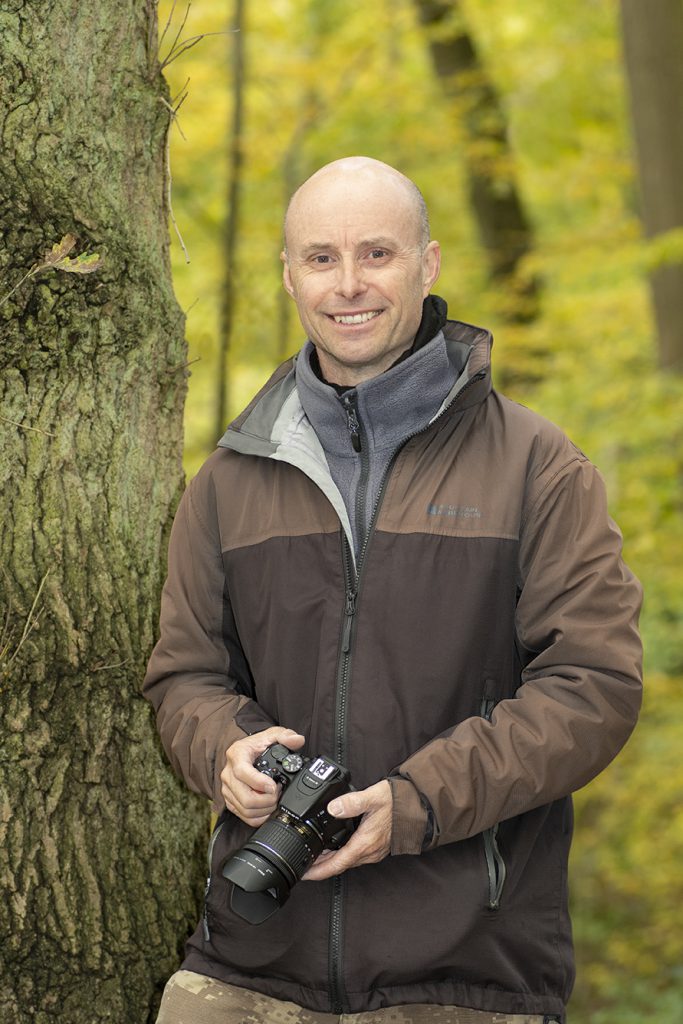
- Steve Hedges LMPA. LRPS
”
Video Lesson Descriptions
Lesson 1: ARTIFICIAL LIGHT
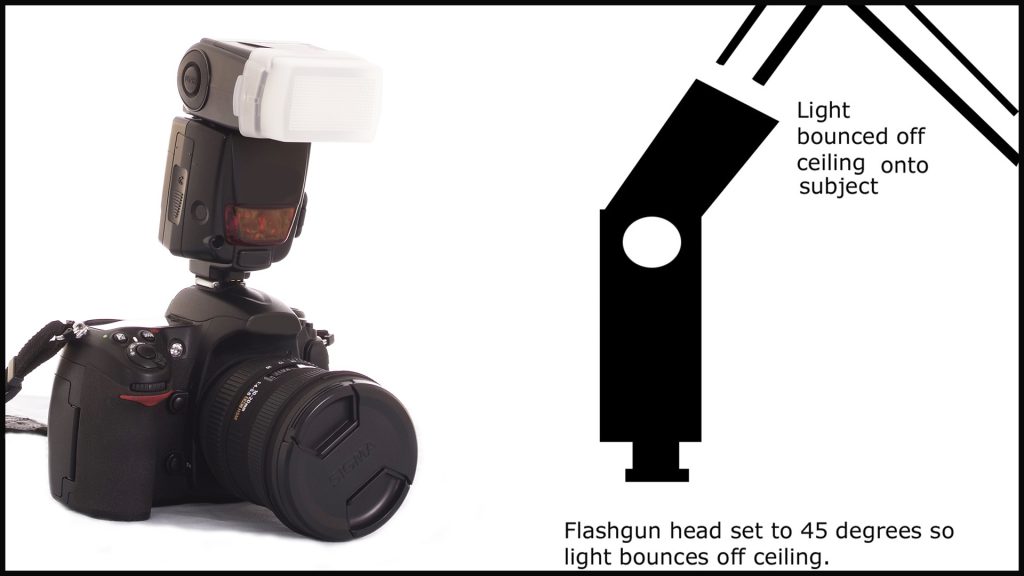
This lesson concentrates on the camera’s built in flash unit or the hot shoe mounted portable flash guns that can be fitted to the top of our cameras. In this in-depth lesson we look at flash modes (1st curtain sync, 2nd curtain sync, slow sync, anti- red eye), flash synchronisation, flash metering options, flash compensation, fill flash, how to achieve the right exposure using flash light, bounce flash and diffusing flash output. Last but not least, how to trigger a portable flash unit remotely. Comprehensive back-up notes included.

Lesson 2: STUDIO / PRODUCT PHOTOGRAPHY
Setting up a home studio need not be an expensive undertaking. In this lesson we look at the equipment required to take professional creative still- life images. The resulting pictures may be for a paying client, an ebay business or the creative joy of taking a fantastic photograph. The process is the same regardless of the reason for taking the picture in the first place. We look at how successful images can be taken using a couple of desk lamps and a sheet of white card, to using studio lighting and accessories. How to light and photograph solid objects, translucent objects such as glass, textured subjects and multiple objects will be demonstrated in this video. Along with how to feather the light source and using a light tent. How to meter each lighting set-up will also be explained in detail. Full comprehensive PDF back up notes are also included.
Lesson 3: HOW TO USE STUDIO LIGHTING
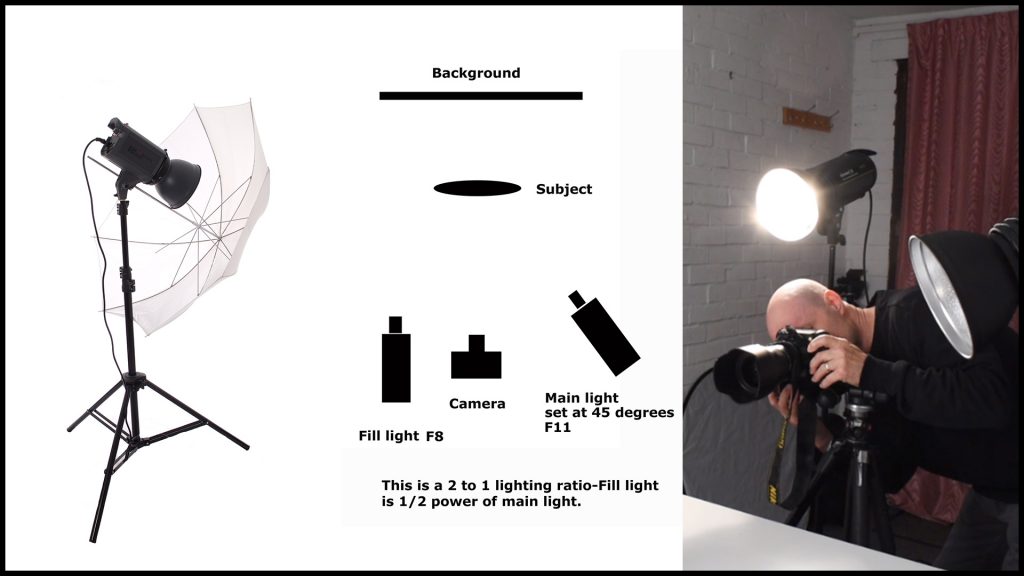
As the name suggests this lesson demonstrates how to use both types of studio lighting: continuous and flash lighting. We take a look at what equipment is available including what lighting accessories can be used to modify the light source. The use of lighting umbrellas (brollies) soft boxes and snoots will be explained. How to set up a single studio light, then more than one studio light will be demonstrated. How to set up a lighting ratio using an incident light meter and a reflective light meter will be explained in detail. Includes comprehensive PDF notes.
Lesson 4: EXPOSURE
As the name suggests this lesson is all about getting the right exposure for your images. This includes subjects such as metering modes (aperture shutter priority and full manual), what metering patterns to use (multi, centre weighted, partial and spot) and how to use them. 18% grey and why it’s important. Incident light meters and the grey card explained. Exposure latitude, integrated light readings and exposure bracketing are also explained in detail. After this lesson you should have a thorough understanding of all aspects of getting the correct exposure. PDF backup notes included.
Tutor Support
“
Along with the video lessons this course also includes projects to be completed which you would then email to me for a constructive critique. Photography is a practical subject so I think the projects add an important practical element to this course.
Throughout the duration of the course I will be available to answer any questions you might have about the course material. Again, I think this is an important part of the course.
- Steve Hedges LMPA. LRPS
”
Taster Clip

How to use this website
Firstly, thank you for your interest in our website.
Once you have added a course or a lesson to the shopping cart and paid the appropriate amount, you will receive an email with a link. Just click on the link and you will then be able to stream the lesson and/or download it.
If you have any problems please email us via the contact page.
Send this course as a gift!